Sunday 9 November 2014

My Favourite Christmas Looks 2014

I just LOVE Christmas. I love everything about it. I love decorating. I love Christmas trees. I love Christmas lights. I sing merrily to Christmas Carols. I REALLY love Santa. I enjoy buying presents for people and wrapping them up and placing them under the tree.

Each year I have to resist the urge to completely change the colours of my tree. Although it has evolved over the years. I AM thinking that I may need to change the colours (Gold/Bronze/Silver/Red) this year not that I have brightened up our home. So I have been looking at the trends for this year and I thought I would share some of my favourites.

Domayne


Domayne have a really interesting monotone theme this year, with Black and White decorations and little pops of colour. While it's not my personal style, I have to say I think this is really cool and quite a bold, contemporary trend.

Target 


Target always have really great Christmas decorations for reasonable prices. This year I really like their Dazzling Brights theme, as it is in keeping with my current love of colour.

Although I am also really loving the Pre-Lit Twig Christmas Tree. I think it would look great with really special, unique ornaments.

Pottery Barn


Injecting a bit of American decorating sensibility into the Australian market is Pottery Barn. They have a traditional range of coulurs, but offer some unusual twists. The 'Traveller' collection is interesting. It has ornaments that give a nod to destinations around the world. They unique, quality ornaments that would add a bit of luxe to your traditional tree.

Myer


In Australia, you really can't go past Myer for Christmas decorations. They always have fun, quality decorations to help you spread Christmas cheer. They have 4 themes this year: Nordic, Luxe, Folklore, Jingle Bells & Mode. They are all really beautiful, but my favourites are Jingle Bells and Luxe.

The Jingle Bells theme is great fun if you have kids. It is really bright and cheerful, perfect for little ones. I also love the colours in the very feminine Luxe theme, with metallics, dusty pinks and reds.


Bed Bath and Table


I really love to go in and look at Bed, Bath and Table. They always have beautiful decorations, and they are always reasonable priced. They have the usual traditional colour scheme (Red, Greed & Gold),but they also have a lovely 'Enchanted Forrest' theme. It features blues, greens and woodland animals. They also have an 'Around the World' theme, similar to Pottery Barn.


I would say my pick for originality goes to Domayne, their Black and White theme is really thinking out of the box. For my own colour scheme I am thinking I may hit up a few of these stores and look for some cool, colourful decorations to add to my usual metallic colour scheme.

Saturday 8 November 2014

Shop What You've Got- Week 1


I am 1 week into the Shop What You've Got challenge, and so far I am not feeling too restricted in my choices (obviously!). I am already starting to have a think about what is in my wardrobe, namely my tops. I am finding that I really don't wear the vast majority of my tops as it is, so I think a cull may be needed soon!

I work 2 days a week as a teacher (for the moment), however I dress smart casual, so I am finding my items will work well for work as well as normal day wear. 

I will confess that I had 2 days in the week where I stayed home all day, so I just wore my 'Lounge Clothes' aka fresh PJ's! I also doubled up on outfits and wore the same one twice, but with different accessories. Sadly, I also was unable to get a photo taken in one of my dresses that I wore to work on Melbourne cup, however it will feature again soon!

Day 1 - I attended a Mexican Fiesta hosted by Danimezza, It was a great night where I got to meet some great ladies and drink cocktails. I wore my Black and White Sleeveless Shirt Dress from City Chic. Although, I forgot to take a photo on the day! I wore it with Coral Sandals, A Turquoise belt and a coral and turquoise necklace. I rewore the dress to work a few days later as seen above.

Day 2 - Was my 'recover from the party' PJ wearing day!

Day 3 - I headed off to work in a CC Black Dress, I wore a Black & Green BambooKimono over the top which I tied together at the back to give me a bit more shape. Simple Black Flats were worn and I wore a tan belt with it to work. The same outfit was worn later in the week when I had to run an errand, but I skipped the belt and threw on a necklace.

Day 4 - We had a Melbourne Cup event at work and I wore my Pastel CC Dress with a cropped Denim Jacket and Nude Flats. I had a very hectic day so I was unable to take a photo,but will rewear the outfit next week,

Day 5- This was another 'At Home' day in PJ's until I changed into the Black CC Dress (seen above) to run a quick errand

Day 6 - It was a hot day and I was going to be out shopping. I wore my Denim Shorts, my Plain Black Top (Best & Less) and my Sheer Oversize Top. Perfect for the busy day as it was comfortable and flowy. Later on I attended a market where I had a stall. I wore my light Crop Jeans and  White Top with a chunky necklace

Day 7 - Another busy day of errand running so I popped back on my Crop Jeans and Plain White Shirt, I also added on another Kimono jacket, Nude Flats and a  Rose Gold necklace.

So, all in all it has been a successful first week. I still have a number of items that I have not worn yet, so I am not bored with my choices.

Check out how everyone else is going!

Saturday 1 November 2014

Shop What You've Got Challenge

I followed the 'Shop What You've Got' challenge, hosted by Jo from iCurvy, with interest last year. I was in the late stages of pregnancy at the time, so I was not able to participate.

Let's face it, at that stage I was down to a few dresses that resembled Mui Mui's, as I was carrying a 9.9 pound baby.

The challenge involves not buying new items of clothing through November. Instead, you 'shop' your wardrobe using what you already own. It encourages you to have another look at what you wear, and get the most out of a few items. I have been trying to downsize my clothing for the past year, and have been working on finding my own style. I feel I am getting there, so this challenge will be a great way to reflect on my wardrobe.

I was determined to take part this year. So, imagine my horror when I realised last night that the challenge had started, as November seems to have snuck up on me!


I sat down this morning and wrote out my list of items. I had a think about what I wear often, what I feel comfortable in, and what I love to wear.
I wrote it all down.

 Dresses 

Black & White CC Shirt Dress
CC Denim Dress
Black CC dress
Blue & White Maxi Dress
CC Floral Dress
Pastel CC dress

 Jeans

Crop Jeans
Skinny Jeans

Shorts/ Skirts

Best & Less shorts
Denim Skirt
Floral skirt
Striped Blue Black skirt

Tops


Plain Black
Plain White
Sheer oversize top
Sheer Sleeveless top
Navy Blue Jewel top

Kimonos

Pastel Floral Kimono
Black/Green bamboo print Kimono
Black Kimono

Jackets

Short Sleeve Denim
Long Sleeve Denim
Black Knit Cardigan

Shoes

Black & Gold Sandals
Coral Sandals
Red Flats
Nude Flats
Black Flats

Heels

Black Wedge Elastic strap
Nude Heels

1 'Special' item for Marcus' 1st Birthday


Luckily, accessories are not included in the list of 30 items, so my list came together quite quickly. It made me realise that in many way, I have already started to refine what I wear. I have allowed myself one item that I *may* purchase for my Son's 1st Birthday, because it's not every day your child turns One, and every Mum deserves a little something special to wear on the day. I may not buy anything, but I am including it in my items in case I do. You may have also noticed I have a whole section dedicated to Kimonos. I really think they will be my 'saving grace'.

So! Let's see how I go. I will post my outfits at the end of each week, and I will also update on my Instagram when I can.


iCurvy World

Saturday 25 October 2014

Getting Vintage Furniture Restored


When I was a child I would love to explore my Grandfather's garage. He had a long, 4 car garage. However, it only fit one car, as it was so full of treasures. My Grandfather used to be a window dresser, so he had many weird and wonderful items. On a hook hanging off the roof, he had a set of chairs. They had springs popping through the leather seat and were in rough condition. They were beautiful. I asked him what he was going to do with them, and he replied nothing, but one day I could have them, if i'd like them. When he passed away, my Grandmother sent them to me.


They have sat in my garage ever since. I loved their shape, and knew that one day they would be a beauty, but I had no knowledge of how to fix them. I did try one afternoon, and very enthusiastically started sanding. However, I had no idea what else to do, so there they were left.

Finally, after updating our lounge room, I decided it was time to dust them off, and get them restored. My friend's Brother is an upholsterer, having taken over the family business. I knew he was a bit of a genius, having seen some amazing work he had done. He had even restore antique chairs that had been damage in a fire.

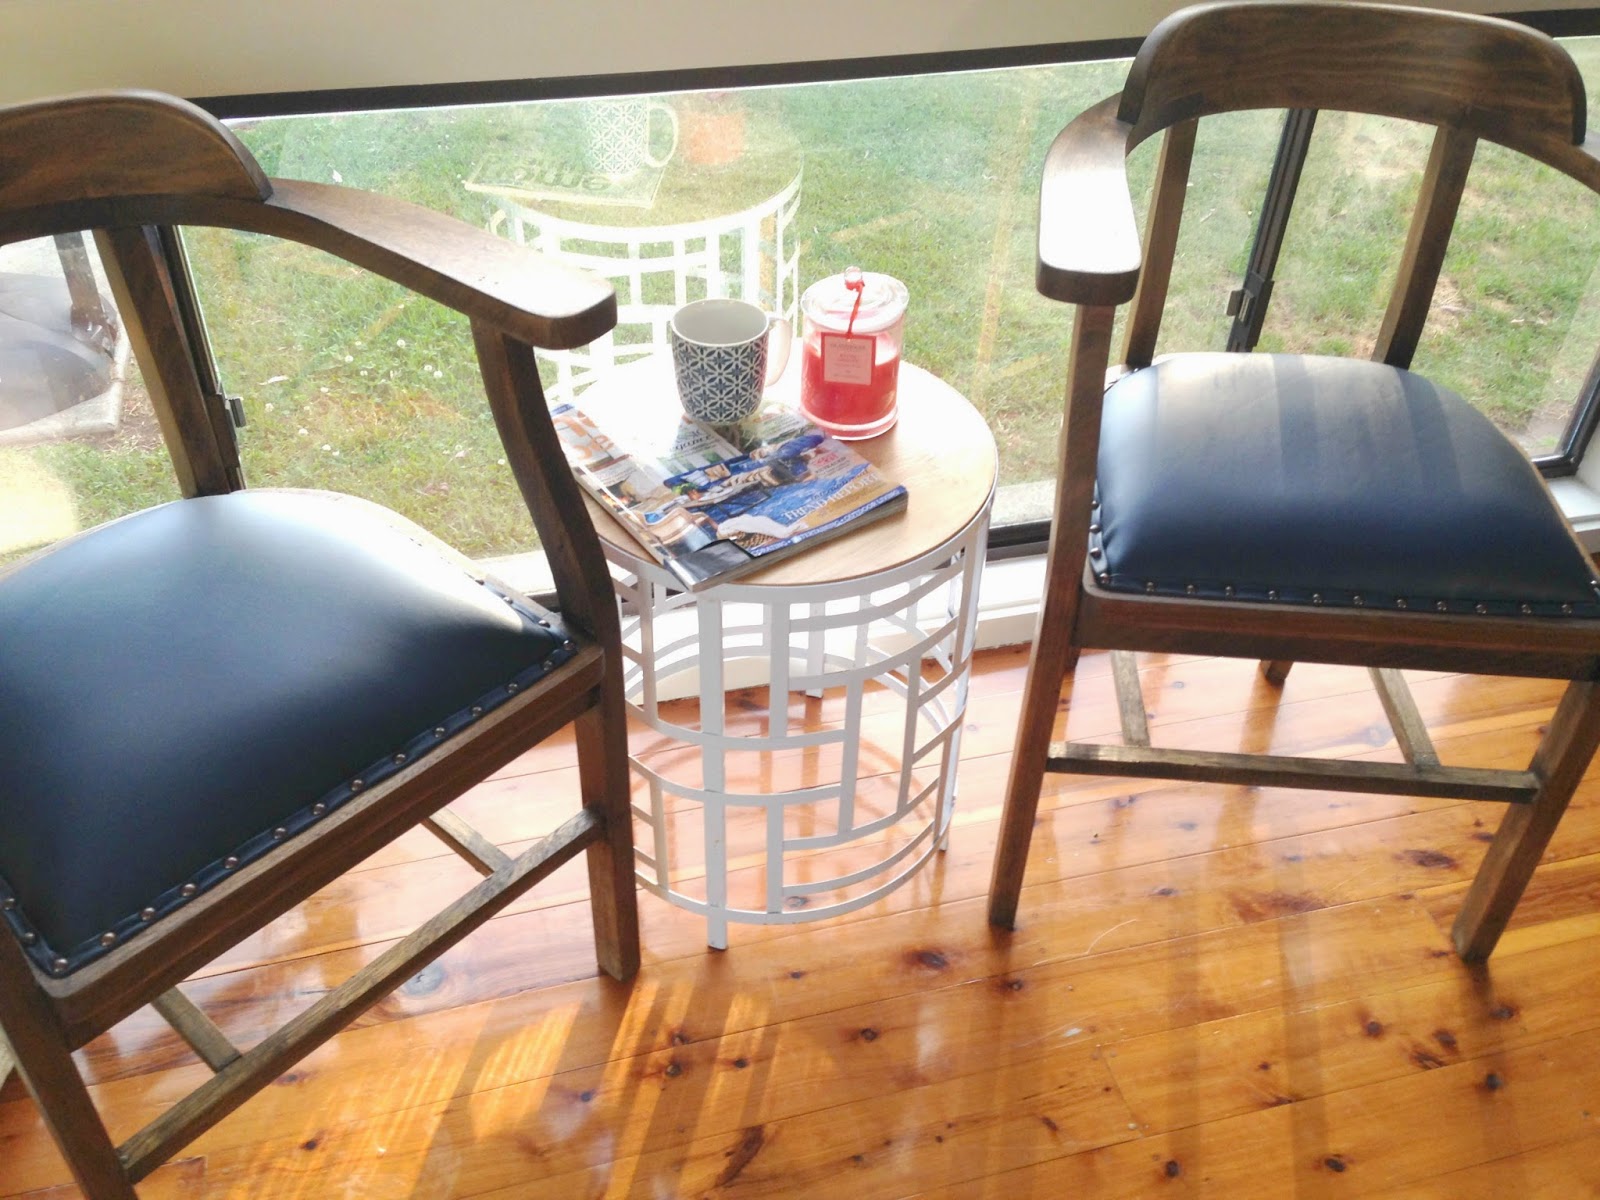
He liked the natural colour of the timber that was showing through from where I had sanded it back, so he decided it would be nice to sand it back and oil the timber. He fixed some broken foot rails and then replaced the seating with a beautiful navy leather and bronze studs.


Just look at that nailhead trim. The blue leather matches my rug perfectly too!I had considered choosing a patterned fabric however I settled for this because a) I didn't want there to be too much clashing fabrics in he room and b) I wanted something classic that wouldn't date


A huge appeal of these chairs for me are the flat arms and curved back. I love the smooth lines they create. 


They are simply beautiful. My next task was to find the perfect table to go between them, and I am considering making mini ottomans for feet to rest on when people sit on them, but am unsure if having them slide under the chairs will overcrowd them.

It was well worth getting these chairs restored. I think, if you are unsure of how to restore an item and if it has too much sentimental value, or monetary value, to rick making a mistake, then it is well worth having them restored.

My hope is that these will become heirloom items, passed down through the generations. In the meantime, I am simply going to gaze lovingly at them, and perhaps pet the arms as I sit in them.

Do you have a beautiful item you would love to see restored?

Tuesday 14 October 2014

Recipe - Blueberry Crumble Teacake


This lovely cake is so easy to whip up. It is from Belinda Jefferies Mix and Bake cookbook. I adapted it so I could use my Thermomix, but you can easily make it in a food processor, or mix master.

The easy part about this recipe that there is no creaming butter and sugar. It is a Wet/Dry mix cake so it quick and easy.

The crumble on top is what really makes this cake special. I made mine in two loaf tins, but I admit I should have followed Belinda's instructions of using a springform pan. I realised my error when I went to turn the cake out and had its of crumble falling off.

This would make a lovely gift though, baked in a disposable  loaf tray, or a very impressive offering when visiting friends.

Makes 1 cake in 24cm Springpan or 2 small loaves

Ingredients

Crumble Topping

Topping :
  • 35g plain flour
  • 55g brown sugar
  • ½ teaspoon ground cinnamon and nutmeg
  • 70g pecans or walnuts
  • 30g cold unsalted butter, cut into small chunks
Cake mix:

  • 150g plain flour
  • 120g wholemeal plain flour
  • 220g caster sugar
  • 2½ teaspoons baking powder
  • ½ teaspoon ground cinnamon
  • 300g fresh or frozen blueberries [I used a mixture of raspberries and blueberries]
  • 80ml light olive oil
  • 180ml milk
  • 1 egg
  • 1 teaspoon vanilla extract
  • 2 teaspoons finely grated lemon zest
  • icing sugar and cream, to serve


Preheat your oven to 180ÂșC. Grease a 24cm springform cake pan.

For the topping: Place the flour, sugar, and spices into thermomix (or food processor) speed 4 for 5 seconds. Add the nuts and butter and put on speed 6 for 5 seconds or until mixture resembles breadcrumbs. Tip into a bowl and chill.

For the cake mix: Place dry ingredients in thermomix Speed 4 for 5 seconds, transfer to a bowl. Remove 1 heaped tablespoon of the mixture in a separate bowl and toss with 200g berries. Set aside.

Measure oil, milk, egg, vanilla and zest in the processor and blend on speed 5 for 5 seconds or until well combined.

Make a well in the centre of the flour mixture and add milk mixture. Sire until combined, then gently fold in blueberry mixture.

Spread evenly in cake pan, sprinkle the crumble over the top and press remaining 100 blueberries into the crumble.

Bake for 50-55 minutes or until a skewer comes out clean. Cool in pan. Dust with icing sugar and serve with cream


Saturday 4 October 2014

Repainting our home - The result

Repainting out home was a lot of work. Before we even could lift a paintbrush, we ad to do a heap of prep work. Our house had a lot of cracks in it as a result of loam and clay soil, differences in moisture under our house and the drought. The most significant crack was in our living room, and it was over 1 cm wide in some points.

Our first step was to replace the section of wall, fill it in then smooth it out. We then also had to sand every bit of skirting, wash the walls, paint the roof and undercoat. It took 2 weeks of solid work to finish (truthfully, we are yet to paint all the doors in the house, but that will be done soon).

Once the house was finished I also went out and purchased a new lounge and a new rug. I am gradually buying new pieces to fit in with my new colour scheme.

The improvement is incredible though. We changed the layout to suit our new lounge. The colour has brightened our whole house and made it seem light and airy.


The pop of colour from our feature wall is refreshing, and will feature in little accents in the living room so it can create cohesion between areas. The darker colour in the kitchen is wonderful, and blends in beautifully.


Overall, I am delighted by the results.


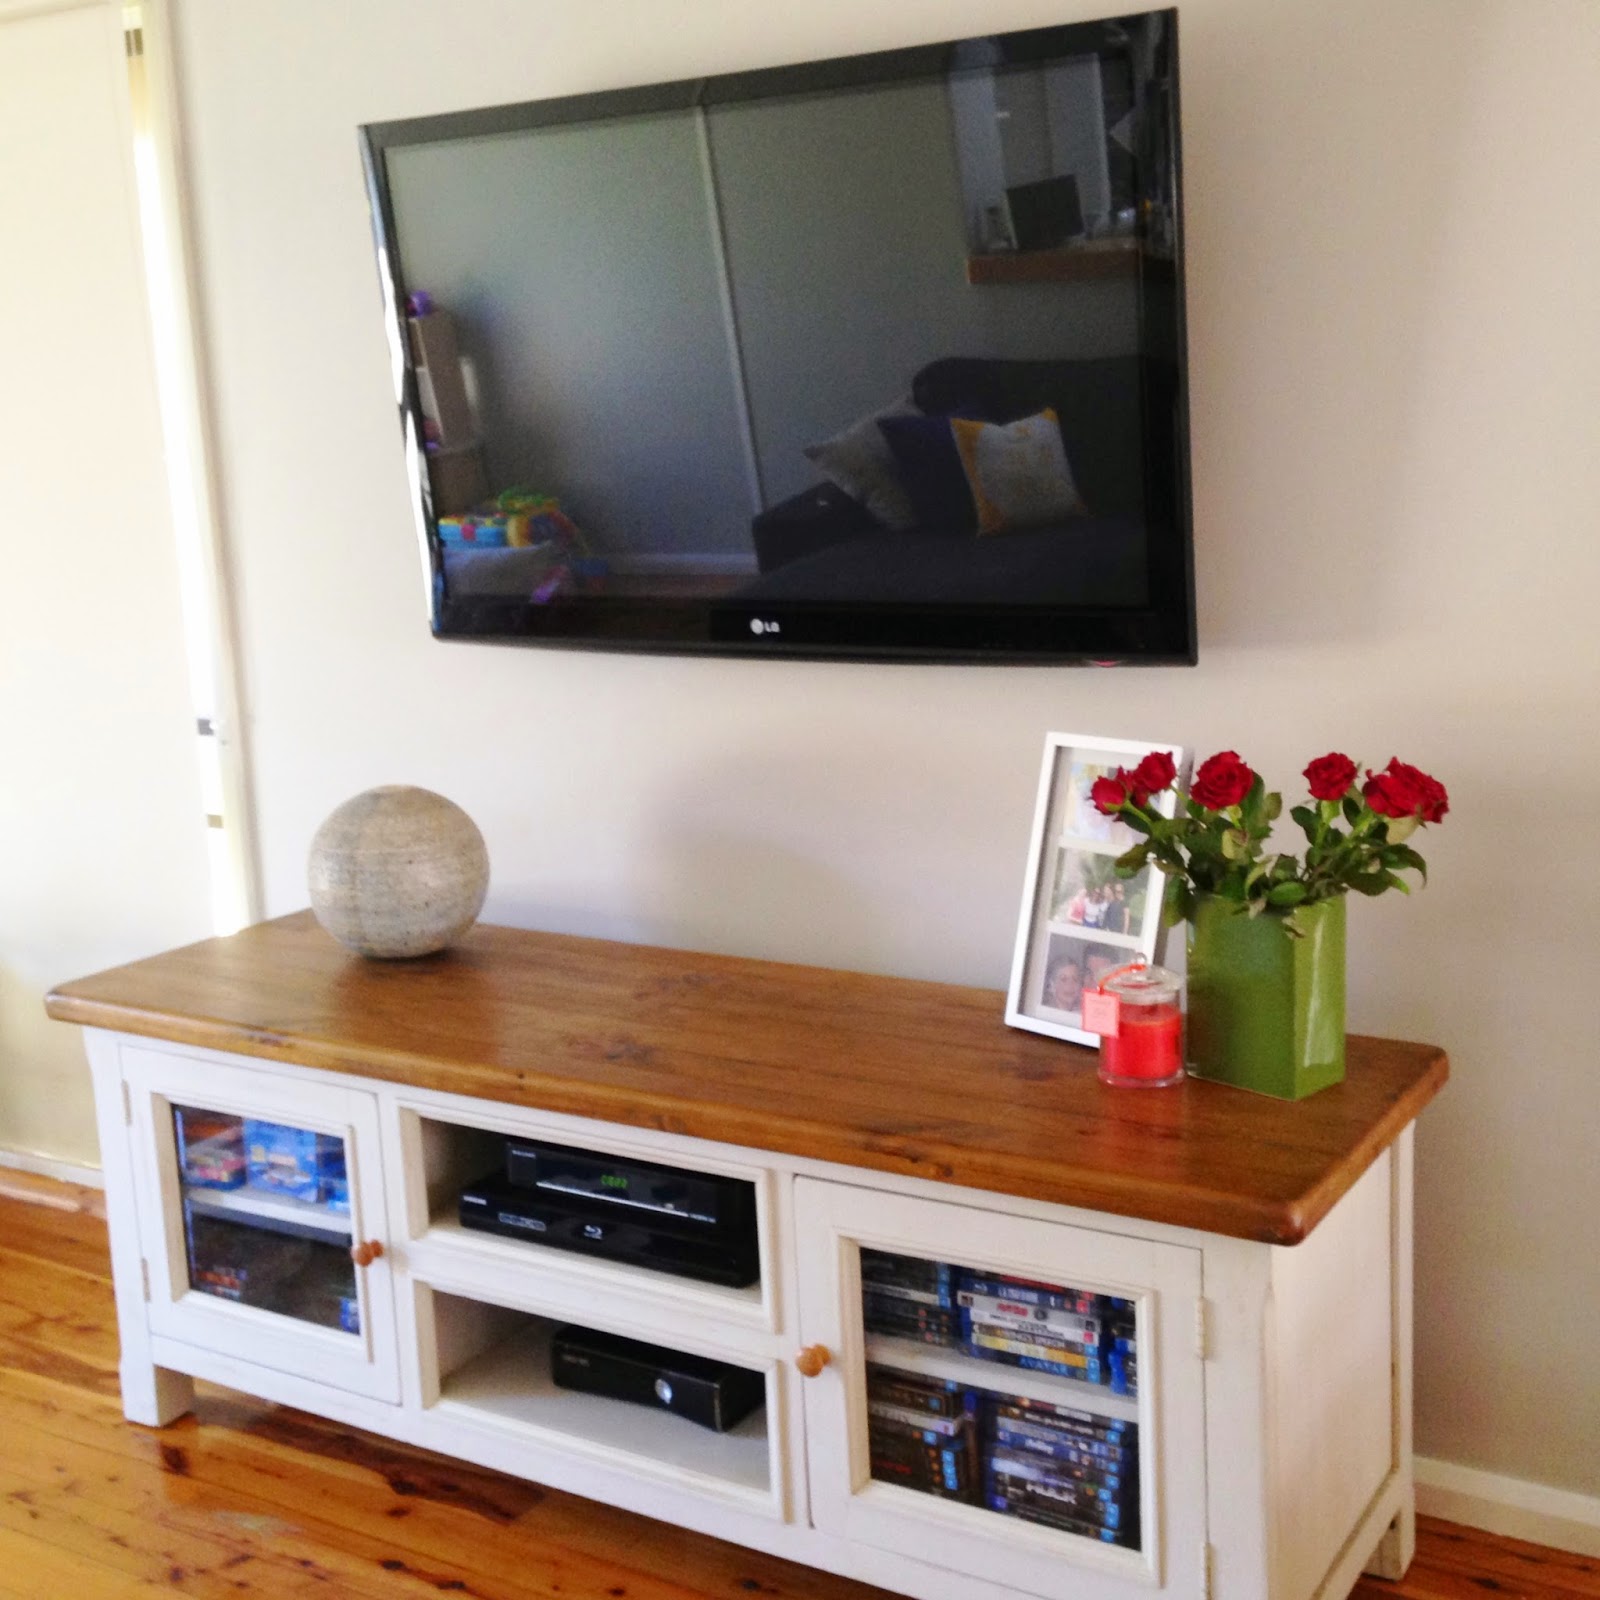
It is still a work on progress. As you can see there is a blank spot under these shelves, where a special restoration project (more details later!) will go. I also have some antique chairs being restored that will go in front of one of the windows.


What I love is that I have plenty of room, and even a kids nook. Our lounge is sooo comfortable, and the whole house finally feel like it's mine.


Wednesday 1 October 2014

Aussie Curves - Animal Print


This is my first Aussie Curves post on this blog. I have participated in Aussie Curves since the very beginning, over at my old blog Sister's Closet. I have left that blog open, so feel free to check out any old Aussie Curves posts.

Animal print is one pattern that generally is always around. Who can resist a bit of leopard print? while animal print isn't something I always gravitate towards,  I have a few items that feature it.

When I decided to dress for this challenge I pulled out a few pieces that I owned. However, it was a sunny, but windy day. I vetoed a dress I have as skirts/dresses on a windy day are not always wise. I thought about a kimono jacket I have, but it felt too dark. I wanted a pop of colour.

That is when  spied my colorful neon animal print scarf. It is a last season purchase from Kmart. It was actually much wider, however I cut it in half as I had found it a bit too full when I wore it as a scarf.

Kimono - Supre
Crochet Top - City Chic
Sandals - Target
Scarf - Kmart

I don't usually wear head scarves as I find they don't sit well and don;t seem to suit me. However, on this particular say it worked. Hurrah! It meant my hair was able to stay in place on the windy day, gave me a pop of much needed colour, and looked rather hip.

I kept everything else very plain, as I was letting the scarf feature. I usually wear a big, bold necklace but I felt bangle suited it better.

I have now been inspired to try wearing a headscarf more often, what do you think?


Friday 26 September 2014

Repainting your home - Using a colour consultant

In my earlier post I shared how I used Pinterest to refine my vision for what I wanted when I repainted my home.

Despite this, I was still unsure. I was not totally convinced that the colour scheme I wanted would work. I also discovered that Benjamin Moore Paints are not available in Australia. However, Dulux do have the colour codes on file.

Repainting the interior of my home was going to be a big job, so I needed to be certain that I would make the right choice. I started exploring the possibility of employing a colour consultant to help me make a decision.

There are many independant colour consultants who can help you with not only colour schemes, but also interior design. After doing some research I decided to contact a Dulux Colour Consultant. I chose to go through Dulux as not only do they have access to the Benjamin Moore colours, they also had a great money back offer, where you received $1 off every Litre of paint purchased 9 Up to $100).

I went to the Dulux Website and sent off an enquiry. Shortly after I was contacted by my assigned consultant and I made a booking. I was very excited when the day arrived for my consult. I ensured that I had my Pinterest board open and ready so I could share my vision.

My Consultant, Cherie, was brilliant. We started with a quick tour of my home so that she could get an idea of the layout, existing colours and permanent features. For example, I havea narrow hallway that receives no natural light other than the light that comes through some 'coke bottle' glass near the front door. We have the afore mentioned cream Kitchen Cabinets, cream blinds and a tile feature in the Kitchen that has a few shades of different colours.

After our tour we sat down and talked about what I wanted. I showed her the pictures of what I liked, including the BM colour I loved. Cherie straight away started pulling out colours from her folder and talked me through them. She suggested a Dulux colour that was similar to the Rever Pewter, but was a little lighter. She then was able to take the A4 sized colour swatch and put it next to my cabinets in the Kitchen to show how the colour worked, as well as on the walls. After some discussion and swapping around we had a great base colour chosen.

We then chose a colour for a feature wall, and a deeper grey colour for the Kitchen. Cherie also had some ideas I wouldn't have thought of, such as painting above my Kitchen Cabinets a darker grey, while keeping the bulkhead between them the same colour of the lounge room. It was an idea I never would have thought of, yet it makes a huge difference in having the colour flow from each area.


After choosing all the colours they were written down, with detailed notes about where each colour went. I was also given some links to some great homeware and furniture stores to help me further along me redecorating path.

After the consult I felt confident that the colours I had chosen were going to be perfect for our home.

Sunday 21 September 2014

Repainting your home - Using Pinterest to gather colour preferences.

I love Pinterest. I think most people do. It is a treasure trove of brilliant ideas, drool worthy pictures and to die for recipes.

Many people use Pinterest to discover lots of great new recipes, plan upcoming parties and wistfully pin craft ideas that they would like to one day recreate (ability, time and materials allowing). I certainly do all of the above, however I have also found it to be a wonderful way to 'brainstorm' design ideas for your home. I want to share with you all how I used Pinterest to develop a clearer plan for redecorating a repainting my home.

 Step 1 - Start Pinning!


I have been wanting to redecorate and repaint my home for a while now, however I had limited time and money to do so. In order to satisfy some of those urges, I started pinning rooms that I liked. There didn't need to be any particular requirement, I simply had to like it.

Step 2 - Look for a pattern

After you have a good collection of pins, go to your board and have a look. See if a pattern has emerged. Do you keep pinning shades of a colour? Is there an accent colour that stands out? Is there a particular pin that you keep being drawn to?

After some time, I found a pattern emerging in my pins. I was drawn to warm grey tones.I even found that I kept pinning a specific Benjamin Moore colour called 'Revere Pewter'.


I especially loved everything about the living room of bloggers Young House Love.


Step 3 - Narrow it down

My dilemma though, was that I was unsure how the grey would work with the cream cabinets in my kitchen. My kitchen/living/dining are essentially open plan, so it needed to flow. I started looking for colour schemes that showed grey with cream tones instead of white.

Now, I had a plan. I was pretty sure that the grey tone would work for my home. It seemed to look good with cream as well. I now had a much clearer idea of what I wanted and what direction I was heading in.


For some, this may be enough. Armed with a colour scheme in mind you might head off to your local paint supplier and be on your way.

For me, I wanted some further clarification. Pinterest had certainly helped me develop a vision for what I wanted, however I was not 100% confident it would work.

In my next installment of this series I will share how I booked a colour consultant to come to my home and help my further clarify my option for repainting my home.


Sunday 14 September 2014

Welcome to my home!

Welcome to my new blog. I have been blogging for a few years over at Sister's Closet. However, I lost my mojo. I took a hiatus and had a think about why I had hit a dead end. I eventually realised that my interests were more diverse now. Sister's Closet was started simply to share tips on Plus Size fashion. However, my interests have now broadened. Rather than overhaul my previous blog, I decided to start fresh.

Here at Home Utopia I want to share the things that make my home my own personal Utopia. I want to explore my home itself, and share any developments I make along the way. I also want to share the goings on in my home. The recipes I make, the craft I do, the clothing I wear and the activities I do with my Children.

I have already started on a very exciting update on my home. We repaired the inside, and my first few posts I want to explore the process that I took to successfully repaint the inside. I am now redecorating as well, and will be excited to share with you my purchases, as well as the thought that goes into making some purchases.

I am an avid cook, and the proud owner of a Thermomix, so I also plan on sharing the recipes that I love to make along the way.

For the last few years I have participated in Aussie Curves. It is a brilliant initiative started by Blogger Dani from Danimezza. Weekly challenges are issued that encourage curvy ladies to dress up and share their fashion. It has been a brilliant community to take part in, as many plus size women have found new found confidence and clothing styles along the way. I plan on still participating in the Aussie Curves challenges and sharing my own style on here.

Being a Mother, I am also a big believer that 'It takes a village'. I use the Internet as part of my 'village' to help raise my children, and I would like to contribute by sharing any activities or wisdom I come across along the way.

So, Welcome to my virtual home. Make yourself comfortable, help yourself to a cuppa and feel free to call in at any time!


Friday 12 September 2014